
How to Export Your Data From Nara Baby (CSV, Step by Step)
Nara Baby has two Export Data buttons that don't export the same profile. Where the CSV lives, which route exports your child's data, what's inside.

Nara Baby export data comes out as a CSV file, one profile per export. The reliable route is Account → Family → your child → Export Data. The second Export Data button, under the avatar on the Activity tab, exports whichever profile is selected. That can be your own postpartum profile, which holds none of your baby's entries.
There are two Export Data buttons
| Where it lives | What comes out | |
|---|---|---|
| Route A: start from the child | Account → Family → tap the child → scroll down to Export Data | That child's profile |
| Route B: start from the Activity avatar | Activity → tap the profile avatar at the top → Export Data | Whichever profile is currently selected, which may be your own postpartum profile |
Both give you a CSV. The difference is whose data ends up inside it. Nara's own FAQ documents only Route B, and Route B is the one that can go wrong.
This guide reflects the app as of August 2026, and the child route was checked again in September 2026. If a screen looks different, the export is still likely in one of these two places.
How to export your child's data: the reliable route
Export Data works on Nara's free plan. We exported a child's CSV from a free account in September 2026, although Nara's paywall lists "easy data export" among its paid-plan features.
Route A starts from the child, so it can't hand you the wrong profile:
- Open Account.
- Go to Family.
- Under Children, tap the child whose data you want.
- Scroll to the bottom of that child's screen.
- Tap Export Data.
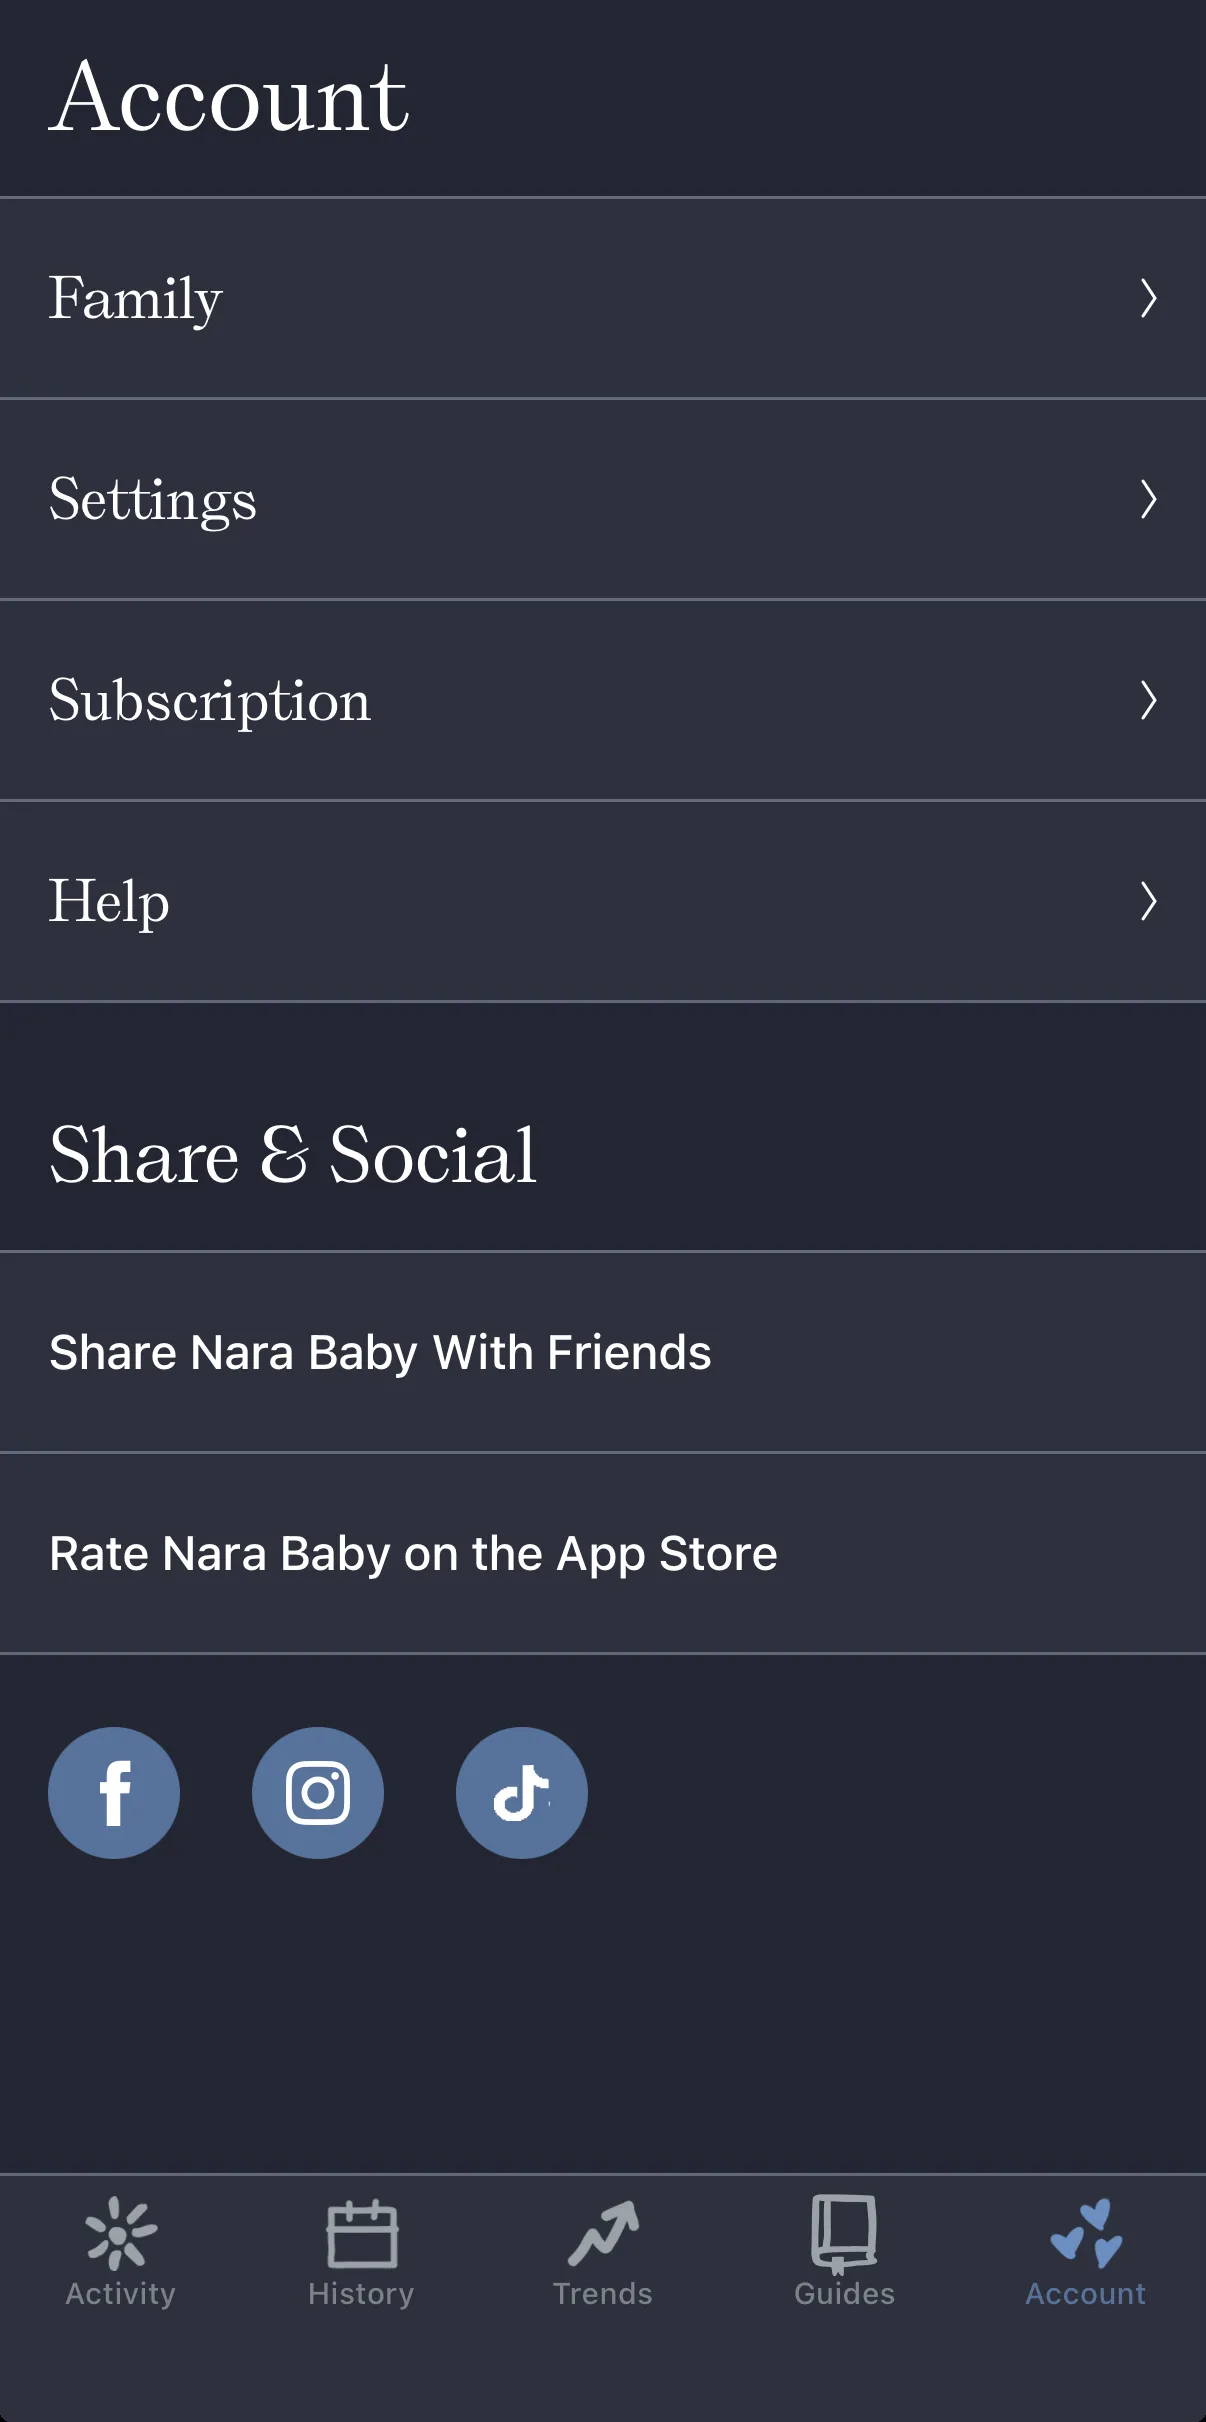
Can't see the button? It sits at the very bottom of the child's screen, so keep scrolling.
The file arrives named after the profile and the date, something like export_narababy_<child>_<date>.csv. Got more than one child? Repeat the steps for each, because one export covers one profile.
The profile trap: why the documented route can give you the wrong file
Nara's own Tracker FAQ describes exactly one way to export, and it's Route B:
If you would like a copy of the data for a child in CSV (Excel spreadsheet) format, go to the main Activity screen and tap the avatar icon next to the child's name. Then tap Export Data.
The wording promises the data for a child. The avatar at the top of the Activity tab is also Nara's profile switcher, though. Nara can track a parent's own postpartum profile alongside each child's, and that avatar moves between them. The Export Data button underneath follows whichever profile is selected at that moment.
So if your own postpartum profile is active, Route B hands you a CSV of your own tracking. None of your baby's entries are in it. Open the file, see nothing you recognise, and it's easy to decide the export doesn't work. It does. The button was pointed at the wrong profile.
Two ways to avoid it:
- Check the name at the top of the Activity tab before you tap Export Data. If it isn't the child's name, switch profiles first.
- Or use Route A, which starts from the child and never depends on what's currently selected.
Either way, open the CSV afterwards. Confirm the profile name and the date range match the child you meant to export. It takes ten seconds, and it's the difference between having your data and thinking you do.
What's in the CSV
It's a standard CSV that opens in Numbers, Excel or Google Sheets. Nara lays it out as one long table:
- A
Typecolumn says what each row is. - Fields that belong to a particular activity get their own columns, written as
[Type] Field name. - Shared columns carry the context every row needs:
Profile Name,Start Date/time,Start Date/time (Epoch),Created By Caregiver,Last Updated By Caregiver,NoteandTime Zone. - A few internal identifier columns (
_familyKey,_profileKey,_activityKey) come along for the ride. - A
Profilerow carries the child's details:[Profile] Birth Date,[Profile] Birth Date (Adjusted),[Profile] Sexand[Profile] Type.
The header row isn't fixed. Nara writes columns only for the types that appear in that particular export. Two exports from the same family can have different headers and a different number of columns. Exports we've opened had 8, 16 and 23 columns.
So read your own header row before assuming a layout. If you're scripting against the file, key off the Type column and the [Type] prefixes. Column positions will shift between exports.
Two columns are more useful than they first look. Created By Caregiver and Last Updated By Caregiver preserve who logged what, which matters if two people shared the tracking. A per-row Time Zone means a holiday or a move doesn't silently shift your timestamps when you read the file elsewhere.
Before you rely on the export, check two things: which profile the rows belong to, and what date range they span. That tells you what you're holding while you can still go back and export again.
Is there a Nara Baby API?
No. There's no public Nara Baby API. Neither the official FAQ nor the terms page offers developer access or documented endpoints, so there's no supported way to pull your tracking out programmatically.
The CSV export above is the official way to get your data out, and it's the one worth building on. Unofficial workarounds in circulation read the app's database out of an Android emulator. We don't recommend them.
They're fragile, and they depend on app internals that can change without warning. They also mean handing your baby's health data to a tool nobody has audited, for a file you can get in five taps.
Common reasons to export
- Switching to another tracker, so your data comes with you and you don't start from an empty screen.
- Keeping your own backup, independent of any one app or account.
- Sharing with a professional, such as a doctor, nurse, paediatrician or lactation consultant who wants to see the actual pattern.
Export first, decide second. Once the CSV is on your phone, it's yours either way. You can keep it, hand it to a doctor, or bring it into a new tracker when you're ready. Grabbing the file in five taps today beats reinstalling Nara in six months because you want the newborn weeks back.
Moving your Nara data to BabyLog
BabyLog imports CSV in its own column layout and has no built-in mapping for Nara's file, so the file needs one conversion step. The Import with AI tab in BabyLog writes the prompt for that step.
You paste that prompt into ChatGPT or Claude along with your Nara file. The AI reshapes the columns into BabyLog's format, and you import the result. CSV import and export are both free in BabyLog.
Your Nara file goes to whichever AI you paste it into. If you'd rather not share it, the import and export guide shows how to match the columns yourself in a spreadsheet.
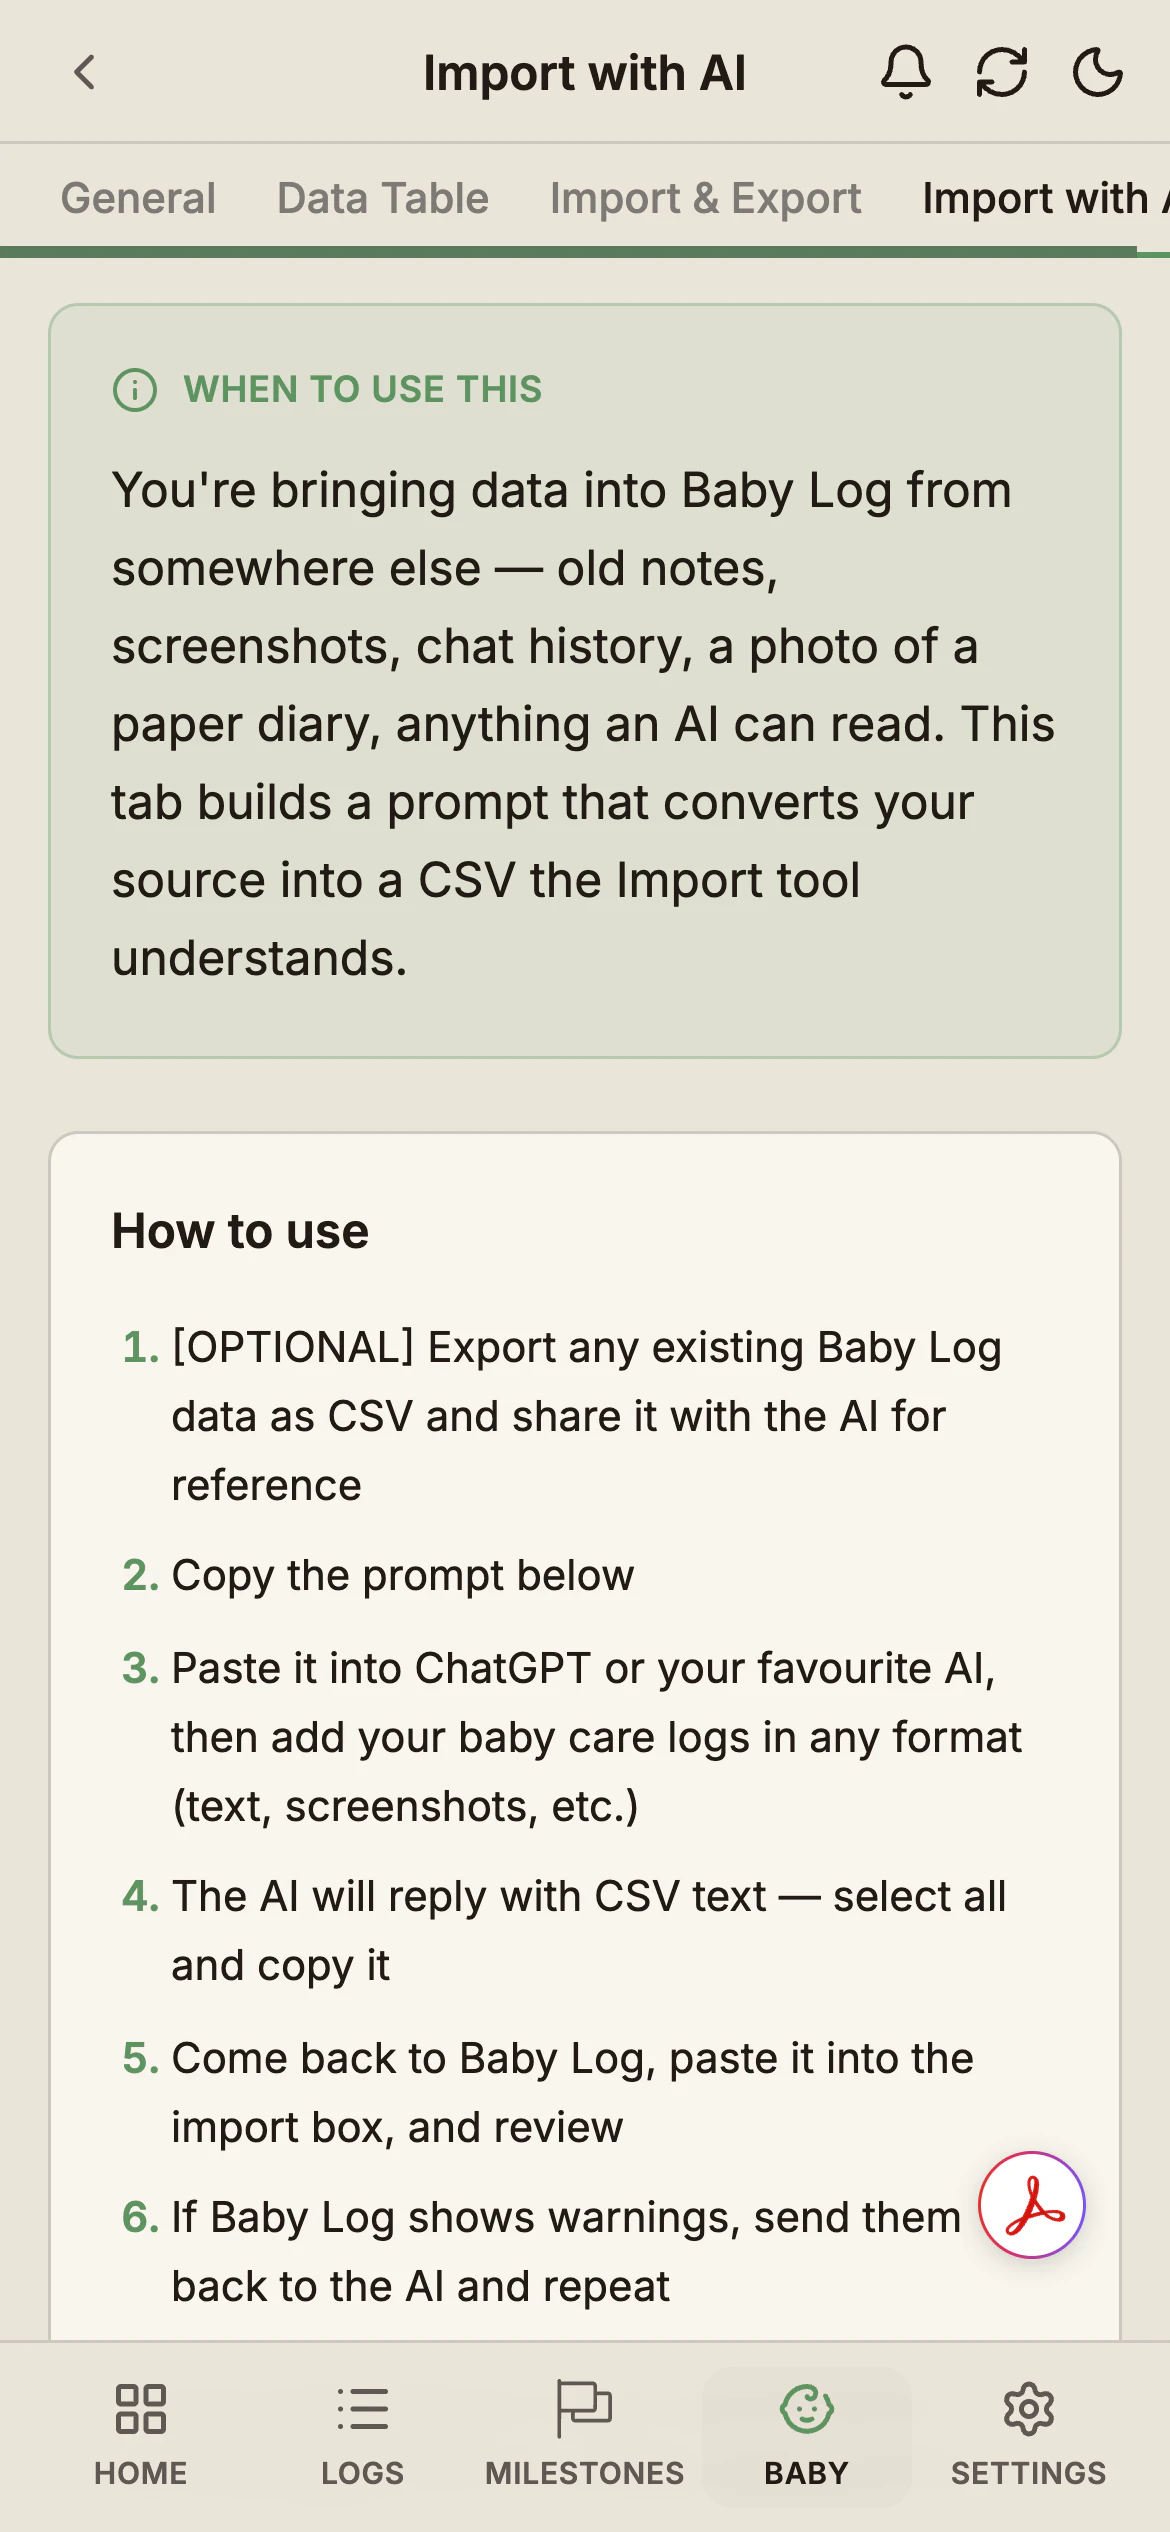
Six steps, most of them copy and paste:
- Export each child from Nara with the child route. Open the file and check the profile name and date range.
- Create an account. Start free and add your baby. Setup takes about two minutes, in the browser on iPhone, Android, tablet or desktop.
- Copy the prompt. In BabyLog, open Baby → [your baby] → Data → Import with AI. Add your baby's name and birth date if you like, then tap Copy.
- Convert the file. Paste the prompt into ChatGPT or Claude, then add your Nara CSV. The AI replies with CSV in BabyLog's format. If copying is awkward on a phone, ask it for a downloadable CSV file instead.
- Load it in. On the Import & Export tab, paste the CSV or upload the file, then tap Preview & Import.
- Review, then confirm. The preview counts new rows and rows that clash with entries you already have. Tap any row to fix or delete it. Nothing is saved until you confirm.
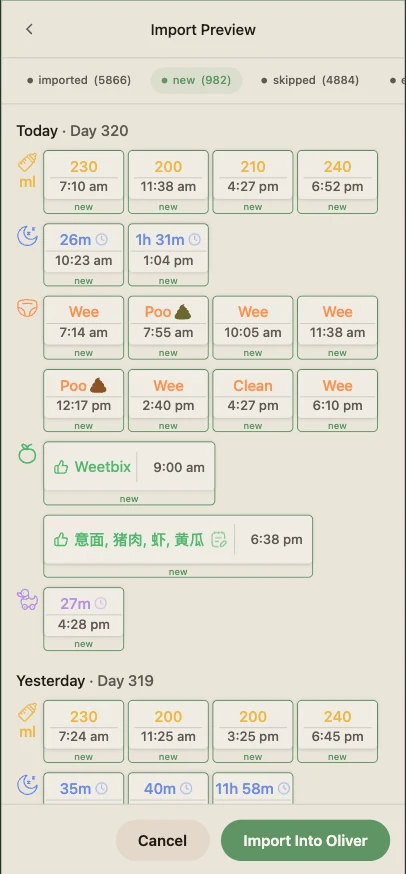
Three checks before you delete Nara
- Spot-check the oldest entries. Open the Data Table in BabyLog and compare the first few days with the Nara file. The AI did the reshaping, so check its work where your records begin.
- Send warnings back to the AI. If BabyLog flags rows, paste the warnings into the same chat and ask for a corrected file.
- Re-run without doubling up. BabyLog treats two logs of the same type at the exact same time as one event. Importing again skips the rows that already landed.
The import and export guide covers each screen, including rows that don't line up and very large files. It's a public page, so you can read it end to end before you sign up.
What BabyLog does with your imported entries
Imported entries sit on the same baby as everything you log from then on:
- Data Table: view, edit and delete any imported entry, with no time limit, on either plan.
- Summary, Calendar, Timeline and Compare go back 14 days on the free tier. The paid plan opens the full history.
- Growth charts plot any weights and heights you bring across against WHO-standard percentiles, across the whole history, on either plan.
- Sharing: if two of you logged in Nara, invite the other caregiver with a six-digit code. Everyone logs to the same baby from their own phone, and each phone picks up new entries when BabyLog opens.
To see your imported weeks and months on the Calendar and in Compare, you can try Pro. The pricing page shows the full split between the two plans.
Still weighing the two apps up? The BabyLog and Nara Baby comparison covers day-to-day logging effort, sharing and offline use. Coming from a different app? There's a matching walkthrough for exporting your Huckleberry data.
Common questions
Ready to start tracking?
BabyLog works on any device — iPhone, Android, tablet, or desktop. Setup takes two minutes.
Keep reading

BabyLog vs Nara Baby: Calm and Minimal vs Calm and Operational
A fair side-by-side comparison of BabyLog and Nara Baby — daily logging effort, reviewing the day, caregiver sharing, offline use, data export and multilingual support — for parenting in Australia, when you want a calm baby tracker.

Huckleberry vs Nara Baby: An Honest Comparison (2026)
Huckleberry and Nara Baby compared on everyday logging, navigation, sleep support, free features and price — and which one we'd actually pick.